How to Build the Perfect Backyard Sauna with a Wood-Burning Heater
Transforming your backyard into a serene wellness retreat is easier than you might think. A backyard sauna equipped with a wood-burning heater not only adds rustic charm to your space but also offers a traditional and authentic sauna experience. This guide will take you step-by-step through the process of building the perfect backyard sauna, from design ideas to safety tips, ensuring you get the most out of your investment.
Step 1: Choose the Right Location
Selecting the perfect spot for your sauna is crucial. Look for a flat, stable area in your backyard that provides both privacy and accessibility. Consider these factors:
Privacy: Install the sauna away from neighbors’ view or use fencing or landscaping for added seclusion.
Proximity to Utilities: Ensure easy access to water for cleaning and firewood storage for the wood-burning heater.
Drainage: Avoid areas prone to water pooling to prevent structural damage over time.
Step 2: Decide on a Sauna Design
When it comes to backyard saunas, there are various design options to suit your preferences and space:
Barrel Sauna: Compact and efficient, barrel saunas are perfect for smaller backyards and are easy to assemble.
Cabin Sauna: Offers more space and a traditional aesthetic, ideal for larger families or hosting guests.
Custom-Built Sauna: Tailor-made to fit your exact specifications, allowing for complete creative freedom.
Each design can incorporate a wood-burning heater, ensuring an authentic sauna experience.
Step 3: Choose the Best Wood-Burning Heater
The heater is the heart of your sauna. A wood-burning heater provides a genuine, traditional sauna ambiance, complete with the soothing crackle of firewood and the aroma of natural wood smoke. When selecting a heater, consider:
Size: Match the heater size to your sauna’s dimensions to ensure efficient heating.
Efficiency: Look for heaters with high thermal efficiency to save on wood usage.
Safety Features: Opt for models with built-in safety features like heat shields and proper ventilation systems.
Step 4: Source Quality Materials
For a durable and long-lasting sauna, choose high-quality materials:
Wood: Use heat-resistant woods like cedar, spruce, or hemlock for the interior. These woods are durable, retain heat well, and emit a pleasant aroma.
Insulation: Proper insulation ensures efficient heating and reduces energy waste.
Doors and Windows: Install tempered glass for windows and doors to withstand temperature fluctuations.
Step 5: Build the Sauna
Follow these general steps to construct your sauna:
Prepare the Foundation: Use a concrete slab, gravel base, or decking to create a stable foundation.
Construct the Frame: Assemble the sauna structure using pre-cut kits or custom plans.
Install Insulation: Apply insulation to the walls and ceiling to retain heat.
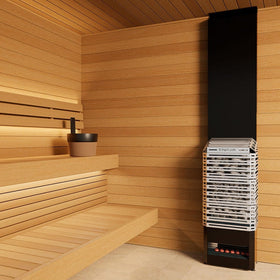
Add the Interior: Install benches, backrests, and wood paneling. Leave space for proper airflow.
Set Up the Heater: Follow the manufacturer’s instructions to install the wood-burning heater, ensuring proper ventilation and chimney placement.
Step 6: Add Design Touches
Personalize your sauna with these ideas:
Lighting: Add soft LED lights or candles for ambiance.
Accessories: Include essentials like a bucket and ladle, thermometers, and hygrometers.
Landscaping: Surround the sauna with natural elements like rocks, plants, or a wooden pathway to blend it with your backyard.
Step 7: Safety Tips
Safety is paramount when operating a wood-burning sauna:
Ventilation: Ensure proper airflow to prevent carbon monoxide buildup.
Distance from Flammable Materials: Keep the heater and chimney away from flammable items.
Firewood Storage: Store firewood in a dry, accessible location away from the sauna structure.
Regular Maintenance: Clean the heater and chimney regularly to prevent creosote buildup.
Step 8: Enjoy Your Sauna
Once your sauna is complete, it’s time to relax and enjoy the fruits of your labor. Pair your sauna sessions with a cold plunge for the ultimate contrast therapy experience, enhancing circulation and boosting overall wellness.
Building a backyard sauna with a wood-burning heater is a rewarding project that brings years of relaxation and health benefits. Whether you choose a DIY approach or hire professionals, the key is to create a space that reflects your style and meets your wellness needs.
Explore our full range of saunas, heaters, lighting, doors, decorative walls and other accessories at www.mysaunaplus.com.


Leave a comment